
Makeup has become awfully complicated. Hasn't it?
So many new techniques, even more products, viral this, viral that. Most of us just want a couple of hard-working products and simple ways to apply them.
In Mamamia's new beauty tutorial series for the adults in the room, Holly Wainwright sits down with beauty and skincare experts to learn the basics for mature skin.
Teresa McNamara is a beauty writer and makeup pro in her 50s. She's all about quality products - whether they're from Mecca or the chemist - and easy-to-understand techniques.
In this session, Teresa shares her 6 tips for achieving the perfect makeup base.
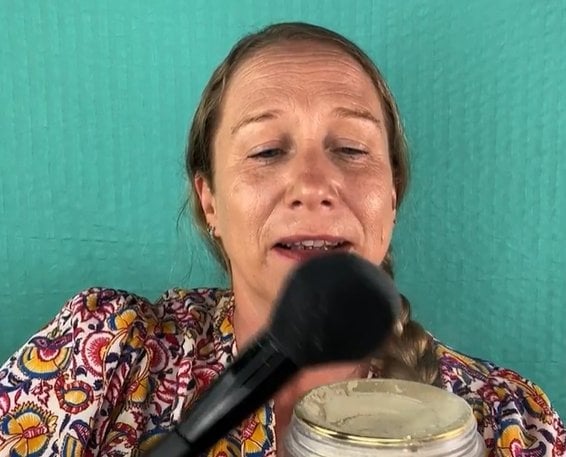
1. Always prep and prime first.
It's easy to skip the first two steps before applying your foundation - SPF is enough, right? Wrong.
"[Skincare] is the biggest thing you can do to make your base look good," Teresa told Holly.
"We're looking for hydrated skin - it's the most important thing. Even if you're oily, you still need to be hydrated."
So - after you've done your skincare, apply your primer (whichever one you like).
"At our age people may have pores and want to use pore filler. [Or they may] want to use a hydrating base," Teresa says. "I like to do an illuminating base."
And you don't have to be fancy applying it, she says - pop some on your fingers, dot it across the face and rub it in.
"Primers are a really underrated product," Teresa tells Holly.
"They tend to do a lot of the hard work - whether that be filling in your pores, or in this instance, used to take out some of the redness."
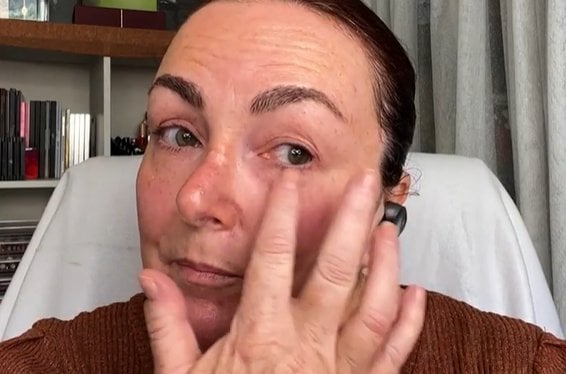 Image: Supplied/Mamamia.
2. Picking the right foundation is important.
There are a lot of foundation types going around at the moment - full coverage, sheer finish, BB creams, CC creams, skin tints... so which one should you be using?
"It comes down to how well you look after your skin [and] how you want the foundation to look," Teresa tells Holly.
"I think there's a real misconception that super lightweight, fluidy products are best on our older skin," she continues.
"The problem with that is while they're great - and it really depends on the sort of coverage you're going for - what can happen is if it's super lightweight, it can end up settling in your fine lines. So, I tend to go for something more mid-range."
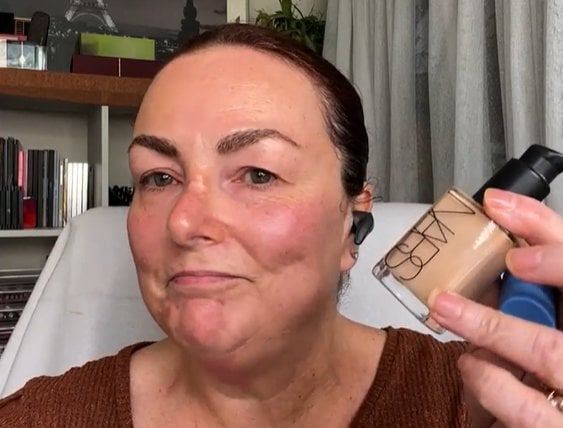 Teresa uses the Nars Sheer Glow Foundation. Image: Supplied/Mamamia.
And it's completely up to you how you apply it - depending on the formula, go for a sponge, brush or your fingers.
A sponge will give you an even, flawless application, while a brush is more precise, and tends to look more natural.
If you go for a brush, Teresa recommends pressing it into the skin, starting from the centre of your face and moving outwards.
"As we age, we have thinner skin around our eye area [and] around our nose, [and] it tends to be where our redness occurs," she says.
3. Go one shade warmer than you normally would.
Now this is a trick Teresa highly recommends.
"If we're too matchy-matchy and [apply makeup in] the perfect tone of our skin, what can happen is we can look a bit ashy and washed out," she explains.
"Whereas if we go that one shade lighter, because we're not going completely heavy, especially on the [neck and decolletage] it will blend in and give us a warmth and help with that glow."
Clever.
Watch: Face base: How to get your glow back. Post continues below.
4. Go easy on the concealer.
You've seen how makeup artists apply concealer. You know - dot some under the eyes, on the nose, forehead and chin. Don't do that.
Instead, Teresa recommends a small amount just below your tear duct - then blend outwards.
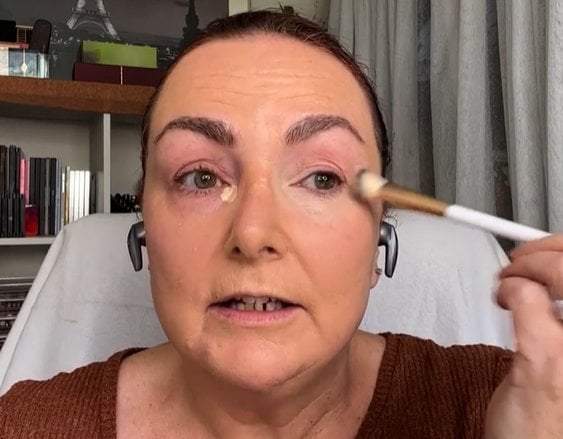 Image: Supplied/Mamamia.
"We always tend to over-use concealer, there will be more than enough there," she tells Holly.
Teresa uses her fingers or a 'cat's paw' brush for the blending part. And if you have darkness under your eyes, she suggests using a peachy coloured concealer underneath, as it will colour correct the darkness.
5. Don't be afraid of powder.
"When I don't set [my makeup] with powder, that's when I'll get creases [in my crow's feet and smile lines], and my makeup will start to melt," Teresa explains.
The beauty writer recommends a bullet brush for the under eyes, as it can get into those smaller crevices, and tapping off most of the product before applying it.
 As Holly demonstrates here. Image: Supplied/Mamamia.
Oh, and make sure your concealer is dry - no one wants them mixing.
For the rest of the face, do the same - just with a bigger fluffy brush, pressing the product into the skin.
"A thin layer, just to set it," she tells Holly.
Another tip: if you apply too much powder, grab a beauty blender and bounce it into the skin once over. This will melt the products together and lift off any excess powder.
6. Finish with a setting spray - or even two.
Setting spray does exactly what it says - sets your makeup in place - and it's an important step to finishing your base.
Teresa uses two, explaining she likes a luminous setting spray followed by a long-lasting finishing mist.
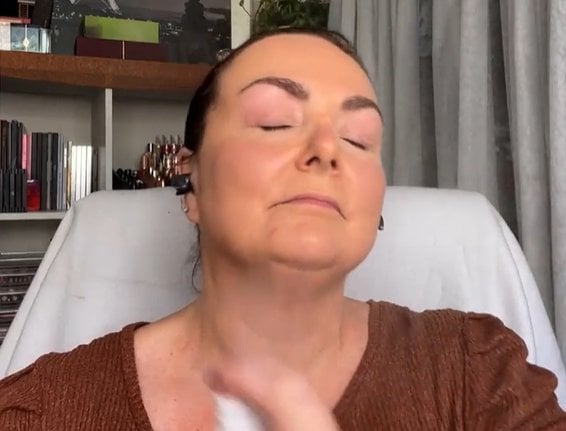 Image: Supplied/Mamamia.
"I use [the luminous one] for my base. Then when everything else is done - my eyeshadow, blush, bronzer - I really set it [with a long-lasting setting spray].
See the full video and watch Teresa's tutorial here.
Feature image: Supplied.
Love all-things beauty? Take this short survey now to go in the running to win a $50 gift voucher!